Need a Professional Fireplace Installation or Service Company Near You?

Fireplace Directory can help! Find a qualified fireplace specialist today.


Maintaining the gasket on your wood stove is essential to maximize efficiency and keep heating costs down. An old or worn gasket allows too much air to enter, causing your stove to burn fuel too quickly. Over time, this can reduce the stove’s lifespan and even lead to dangerous over-firing. A poor seal also uses more fuel, burning through your valuable firewood supply quicker than a well sealed wood stove.
Short answer, when it fails. This should not be frequently! Maybe every 5-15 years depending on use. Once the gasket no longer provides a seal, your wood stove loses heating efficiency. You do not want your stove to be leaky. Too much air is how overfiring and unrepairable damage occurs. We replace ours every 4-6 years on average with heavy use.
By replacing the rope gasket regularly, you’ll keep your wood stove safe, efficient, and enjoyable for years to come.
1. Identify Your Appliance and Locate the Ratings Plate
Determining the exact make and model is essential because gaskets are not “one-size-fits-all”.
2. Use Reliable Resources to Find Your Manual
Once you have your model number, find the manufacturer’s official specifications.
3. Accurately Measure the Channel (The Professional Way)
If you cannot find your manual, do not measure the old gasket, as it is likely compressed and will give an inaccurate reading.
4. Choose High-Quality Materials and Fresh Cement
5. Essential Installation Preparation
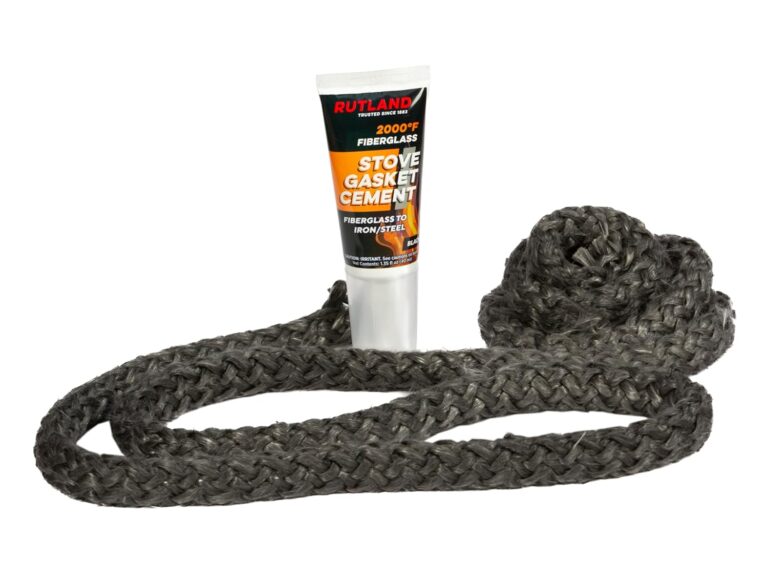
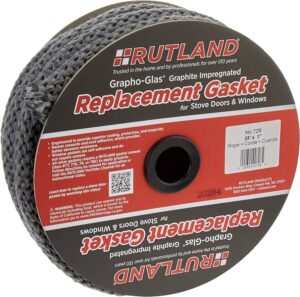
Rutland Grapho-Glas is widely considered the industry standard for wood stove rope gasket replacement. Its advanced engineering offers several specific advantages over generic white fiberglass ropes, making it a favorite for both professionals and DIY homeowners. Make sure you have the correct rope gasket thickness and length before purchasing!
Using our Amazon links helps support The Stove Shop! As an Amazon Associate, we earn from qualifying purchases.
Rutland offers gaskets in both standalone ropes and convenient all-in-one kits.
All-in-One Replacement Rope Gasket Kits: These include a 7-foot rope and a tube of Rutland E-Z Spread Fiberglass Stove Gasket Cement. Most homeowners prefer these kits because they provide exactly the right amount of adhesive for the job. Some of the cement in these kits can sit for too long. You might need to buy another if you go with a kit.
While older adhesives required a heat cure, many Rutland kits now feature cement that cures fully in 24 hours at room temperature. This allows you to replace the gasket one day and enjoy a smoke-free fire the next. It also means the cement is typically single use despite our most optimistic projections and desires over the years.
Installing a rope gasket in your wood stove or wood fireplace insert is an essential maintenance task that helps ensure the efficiency and safety of your heating system. A worn-out gasket can lead to air leaks, reducing the stove’s efficiency and increasing the risk of smoke entering your home.
1. Gather Your Materials – New rope gasket of the correct diameter and length for your stove or insert. Gasket adhesive designed for high temperatures. Scissors or a sharp knife to cut the gasket. A wire brush or sandpaper to clean the groove. Protective gloves to keep your hands clean and safe.
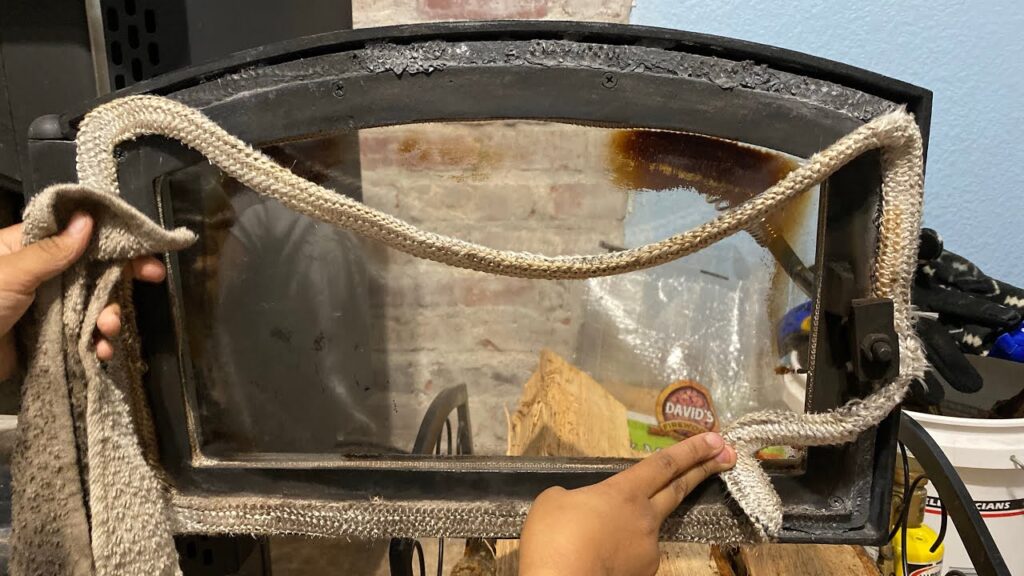
2. Remove the Old Gasket – Open the stove or insert door and locate the old gasket. It’s usually seated in a groove around the door’s perimeter. Carefully remove the old gasket. You may need to use a screwdriver or pliers to start, but be gentle to avoid damaging the groove. Clean out any residue or adhesive left in the groove using a wire brush or sandpaper. The surface must be clean for the new adhesive to bond properly.
3. Prepare the New Gasket – Measure the groove where the gasket will go to determine the length of rope gasket you need. Add a couple of inches to ensure you have enough. Cut the gasket to length with scissors or a sharp knife.
4. Apply Adhesive – Apply a bead of high-temperature gasket adhesive inside the groove. Follow the manufacturer’s instructions for the adhesive you’re using, as some may require a waiting period before placing the gasket. Work in sections if the adhesive sets quickly.
5. Install the Gasket – Starting at one end, press the rope gasket firmly into the groove. Make sure it’s seated evenly all the way around. For corners or curves, gently bend the gasket without stretching it, to maintain its thickness and effectiveness. If your stove has a specific point where the gasket ends meet, align them as required. Some manufacturers recommend slightly overlapping the ends, while others suggest butting them together without overlap.
6. Trim and Secure – Once the gasket is fully seated, trim any excess material at the ends to ensure a perfect fit. Close the door to press the gasket into place and allow the adhesive to set according to the manufacturer’s instructions, usually 24 hours before firing up the stove.
7. Test for Leaks – After the adhesive has cured, check the seal by closing the door on a piece of paper. If you can pull the paper out easily with the door closed, the seal may not be tight enough, and you should check the gasket for gaps or uneven areas.
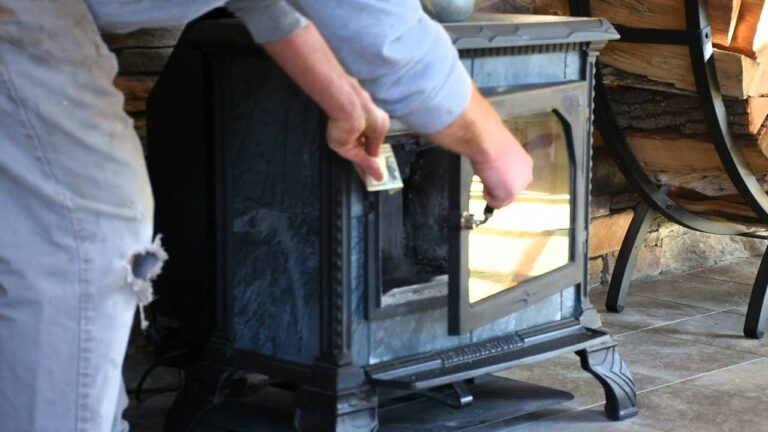
Our favorite way to determine if wood stove rope gasket is properly installed is with the dollar bill test.
After the adhesive has cured, perform the “Dollar Bill Test”:
Fireplace Directory can help! Find a qualified fireplace specialist today.
We are grateful to be of use on your home heating journey. If you ever have any questions, please reach out to us at The Stove Shop in Phoenixville, PA.
Thank you for taking the time to read this article. We have a number of affiliate links in this article. Our local, family business gets a small percentage every time you buy something based on our recommendation. It doesn’t impact you and it helps us.
Regular gasket replacement keeps your wood stove operating safely and efficiently. If you need help finding the right parts or want professional installation, visit The Stove Shop. Serving Chester, Delaware, and Montgomery Counties in Pennsylvania since 1977, we specialize in brands from Hearth & Home Technologies, including Vermont Castings, Heat & Glo, Harman, SimpliFire, Heatilator, Quadra-Fire, and Majestic.
3 Responses